Why You Need Flash Fill…
Flash Fill is a time-saving feature that reads patterns in adjacent columns and 
automatically fills the remaining cells in a column based on those patterns. It is useful when you need to join cells (Excel calls this Concatenate), or separate information in cells without wanting to write a cumbersome formula. You might already know the Text to Columns feature but this is faster and easier – Kind of like AutoFill on steroids!
Flash Fill should automatically be on by default but you can check here: File tab > Options> Advanced:

This amazing tool will make short work of many repetitive tasks, all without formulas (or the Text to Columns feature)! Just make sure you are working next to the column(s) you want to Flash Fill. Here’s just a few of the things it can do:
Splitting Input Data
You received a huge spreadsheet where someone has put first and last names in one column, and you need them separated for sorting and filtering. (This could be any data, i.e., department name and phone extension, or salesperson and monthly sales figure. Doesn’t matter as long as the data has a separator, such as a space). Flash Fill to the rescue…
Example: Full names are in Column A. Here’s the steps:
Insert: two columns to right of Column A, and enter appropriate column header labels.
Type: “Fred”, in appropriate cell ( B2 in example).
Press: ENTER to go to cell below.
Type: “Mary” (note that Excel has figured out what you are doing; displays the remainder of first names, and is awaiting your approval).
Press: ENTER, and presto, all the rest of the first names are added!

Repeat the above steps in the cells for Last name (In example, C2)
List is now complete:

Just Want Last Names?
You can have flash fill complete only the last name, i.e., just insert one column, and instead of typing “Fred”, you would type “Frump”, ENTER, then “Lamb”, ENTER, and you would be done.
Combining Data
You can do the reverse of splitting data when you have or receive a workbook with data that is in two columns and you would like combined into one.
Example: Fred is in Column A and Frump in Column B:
- Insert a blank column to right of Column B.
- Type the first instance the way you would like it displayed, i.e., Fred Frump or Frump, Fred.
- Press ENTER and start to type the second example. Excel should display the preview for the balance of the column. Just press ENTER to complete.
You Mean Flash Fill Does More?
Give Excel one or two examples of what you are trying to accomplish so Flash Fill can see a pattern. It will work with text, email addresses, dates, numbers and time:

If Flash Fill does not appear to work when entering the second example, you can activate it from the Ribbon: Data tab > Flash Fill or keyboard with CTRL E. Just click in the second cell (ensure blank) and use the Ribbon command to fill down the column.
ALERT: Be aware that if you change source data, cells containing flash fill data will not update as there are no formulas involved.
There are many other ways to use Flash Fill. Now that you can save all that time entering data, what ways will you use it?


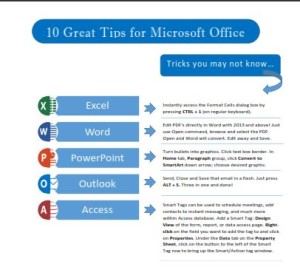
 Click to download great tips to speed up your Office projects.