Finally, a way to capture multiple items from Windows screens and use them over and over again. It is not on by default so let’s look at how to activate Windows 10 Clipboard History!

What Clipboard History Does
Simply put, Clipboard History puts Copy and Paste on steroids. Normally, Windows stores the last object you cut or copied to the clipboard and then is replaced by the next one as it could only hold one object at a time. Clipboard History changed that when it first appeared in Windows 10 at the end of 2018.
The feature supports text, HTML, and images less than 4 MB in size. Anything larger will not be stored in the history. Clipboard history stores up to 25 items. Once maximum is reached, oldest items are replaced with the new ones. Be aware that the contents are stored in RAM so any entries will be lost when your device is restarted unless you pin those you want to keep.
How to Activate Windows 10 Clipboard History
- Open Start menu and click on the Settings (gear) icon.
- Click on the System option on the Settings page.
- Select the Clipboard option from the left of the screen (sidebar).
- Click the toggle on for Save multiple items on the right panel to enable clipboard history feature on Windows 10.

How to Retrieve and Use Clipboard History
If you have done a lot of copying and pasting, you are familiar with CTRL X to cut (move); CTRL C to copy and CTRL V to paste. Other methods such as right clicking selected object and choosing Cut or Copy also work. To view and use the Clipboard History, just press the Windows key + V key and scroll the contents. Newest entries will be at the top. Click on the entry you want to paste.
Delete or Pin Clipboard Contents
If you have an entry you want to save for future use, point at it and click the ellipsis (…) in the upper right corner to display the Delete, Pin and Clear
All options. Choose Pin to keep it available after Windows has done any Restart. Anything not pinned, will be deleted any time Windows resets.
Delete will remove only the selected object. Clear All will empty the Clipboard so you can start over and again store up to 25 items.

Microsoft Office Programs
Note: Clipboard History will capture from all of your screens, not just Microsoft programs. The MS Office Clipboard which has been around for many years, can store up to 24 items, but only works between Office applications.
If you are only copying and pasting between Office programs, use its own Clipboard. My experience is if you have both clipboards activated, they will both capture any text entries but the Windows clipboard doesn’t grab images inside of the Office file.
Turn on the Office Clipboard:
It is in the Home tab | Clipboard group. Just click the dialog box launcher in the corner of the group:

Now every cut or copy you do in any Office program will display on the Clipboard and be available in all of them.
Note: Windows Snip and Sketch has replaced the Snipping Tool and the popular garage Snip app for single copy and paste actions. If you are not familiar with this, get more information from Microsoft at: https://www.windowscentral.com/how-use-snip-sketch-take-screenshots-windows-10-october-2018-update
Want some more Windows 10 features that you may not be using? Take a look at my blog on Virtual Desktops. They are fun and useful too: https://gaylelarson.com/create-virtual-desktops-in-windows-10/
Thanks for reading! Have you been using Clipboard History? Let me know how it has worked for you in the Comments below.


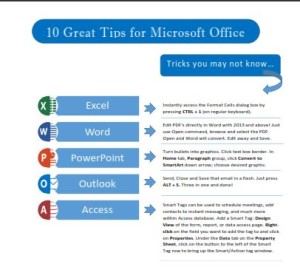
 Click to download great tips to speed up your Office projects.