Snip Vs. The Snipping Tool
The new, free Snip tool takes the familiar Windows Snipping Tool that has been included in the Accessories folder of the operating system (in any version above XP) to a new level. While the Snipping Tool is a great screen capture tool and includes basic annotation and highlighting features, it lacks some capabilities found in Microsoft Snip.
Snip is one of several “garage” projects created by Microsoft employees who are being encouraged to create apps outside of the regular Windows and Office programs. How awesome is that! It is not included but can be downloaded free to Windows 7 and above. You can download it here and also see examples of how people use this tool: Download Here

Snip has three main steps of Capture, Annotate and Share and different ways to make that happen. A great feature is that it saves each capture in a Library so that you can use the snips again. It also allows voice recording, and saving as MP4 video.
Screen Capture with Snip
Once installed and opened, the dialog box will position itself at the top center of your window but you can drag it to any border or float it anywhere on your screen.
Activate a screen capture with the by clicking the Capture icon or pressing the PrtScrn keyboard shortcut which is automatically assigned.

You can click on the icons directly for the specific type of capture. The main menu is divided into three primary functions, Capture, Whiteboard and Camera.

Snip Editor Toolbar
If the PrtScrn key is pressed or the Capture icon clicked and either the whole screen or a portion selected, the Snip Editor toolbar displays with options to record, annotate, highlight, and more.
Captures are automatically copied to the Windows Clipboard and any audio added will automatically be converted to a MP4 file. You can then embed on websites, play as video and/or save to desired location.

The Capture button can be used to get screen shots by either cropping the desirable section or by capturing the entire screen. The default selection is generally entire screen and can be captured with a click or by pressing Enter which displays the Snip Editor above.
Whiteboard is more like an extended paint tool and it will let you highlight and scribble and simultaneously explain what you are doing through voice recording.
Last but definitely not least, is the Camera capture button, which simply switches on your webcam and allows you to take a picture of yourself. Editing options are same for Capture, Whiteboard and Camera.
Note: The Record button records the annotations and other screen actions as well as any voice audio you use to explain your onscreen activity. The screen can be shared by email or saved to your hard drive.
Customize Options for Snip Tool
There aren’t many but you can control a couple of things from the Settings icon on the Snip Editor toolbar. If you don’t want the PrntScrn key to auto capture the screen, you can remove that shortcut. There is a delay feature but I haven’t found any reason to use it as, unlike the Snipping Tool, you can capture drop-down menus and dialog boxes by displaying them, then pressing the PrntScrn key (which is why I leave it active) – a huge advantage!

Take a screenshot in Windows 10 and Windows 8
Windows 8 and 10 users can press the Windows and PrntScrn keys together to capture the entire screen and the image will automatically save to a Screenshot folder inside of the Pictures library. Earlier Windows versions copy to the Clipboard.
Take a screenshot on a Windows tablet or smartphone
Windows tablet owners can take a screenshot by pressing both the Windows button and Volume–down key at the same time. The image will auto save in the Screenshots folder in the Pictures library.
On a Windows 8.1 Phone, you do this by pressing the Power button and Volume–up key together. On Windows 8 phones, press the Start button and Power button at the same time. Screenshots are automatically saved in the Photos
Hub section
Summary
It is exciting to see Microsoft releasing these “garage” projects that are innovative and free. Although there are many other programs that can do the same or similar things to Snip, most are not free (definitely a bonus)! Other ventures from Microsoft include Sway (online creative graphics) and Mix for PowerPoint which you can download into that application. Along with the purchase of other programs such as Wunderlist and LinkedIn, there seems to be a move towards creative features that can be used in both Office 365 and Windows.
Want to try Mix? Go to my blog post on Mix here for more information: PowerPoint Mix on gaylelarson.com
Go here to see my previous post on the Windows Snipping Tool: Windows Snipping tool blog on gaylelarson.com
Have you played with Snip? What feature do you like best?
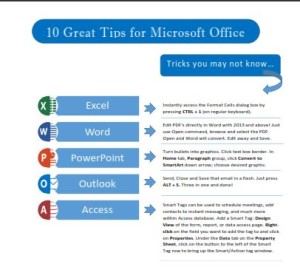
 Click to download great tips to speed up your Office projects.